Friday, May 28, 2010

Tin bashing part 47

More decptively small and innocent looking repair pieces to make up, all looks so simple in the pictures - bish, bash, bosh.
3 hours, OCD let me be.

I forgot the initial pictures, you can probably gues where how it looked when i started??


and this is going to go.... here.

Posted by Picasa

I just can't shake it

I might, had it not been for OCD, just have tried to ignore this bit, put some rust 'killer' on it, but alas (or is it yeah) i couldn't, didn't, wouldn't, can't.

Had to scratch my head a bit to try and figure out how i was ging to get this back together again, three panels overlap and join but all spread out in different directions.
Didn't really know what to do, so i just cut all the rust out and decided to take it from there.


Posted by Picasa

Long term worry maker

Now this next piece has been playing on my mind from the first day i discovered it probably about 2 years ago, pre, i can actually weld era. A small rusty bit surrounded by spot welds high up in the wheel arch, the spot welds being....


the bracket for the hinge for the bootlid, found as you would expect, in the boot.
Now i have no idea why debris and moisture would collect here ( adodgy boot seal?) but it had and rusted through from the inside out. My fears were that i would have to drill the spot welds and take the boot hinge bracket off. I'd been saving this particular job until i had worked up enough faith in my abilities to tackle it. In the end it turned out to be the easiset bit of fabrication so far.


Cut it out.


i found that it was very localised at that i could get a clean edge to weld to without touching a single one of the spot welds. Joy. And i found a nice lump of oddly compacted 40 year old debris.


make a patch. I'll chuck a load of rust proofing down behind the bracket and it should be OK.


Posted by Picasa

Wednesday, May 12, 2010

Mr Fussy

.....yeah the nice term for being an anal retentive is probably mr (or Mrs) Fussy. I find it impossible to just bodge this car back together so i can drive it this summer, my Mr. Fussy, ahem, qualities just don't / won't allow it. Grrr me and my OCD.
So while one part of me yearns to be sitting behind the wheel of my too cool for school automobile gliding down the road, the other half of me is faffing about perfecting bits of steel that, once welded on, won't be seen by anybody else, possibly ever. But 'ill just know it isn't right.

That means more snip snip snipping of cardboard and cold forming of steel to make these pesky repair pieces.
It's going to good when i'm done.

more cereal box models. just getting these to fit takes a hour or so.


lots of cutting and eventually persuading the steel to the right shape gives this. I had absolutely no hope of making this one in one piece due to lack of skill, i even convinced myself it couldn't be done in one piece so i'm making it in 3 pieces.


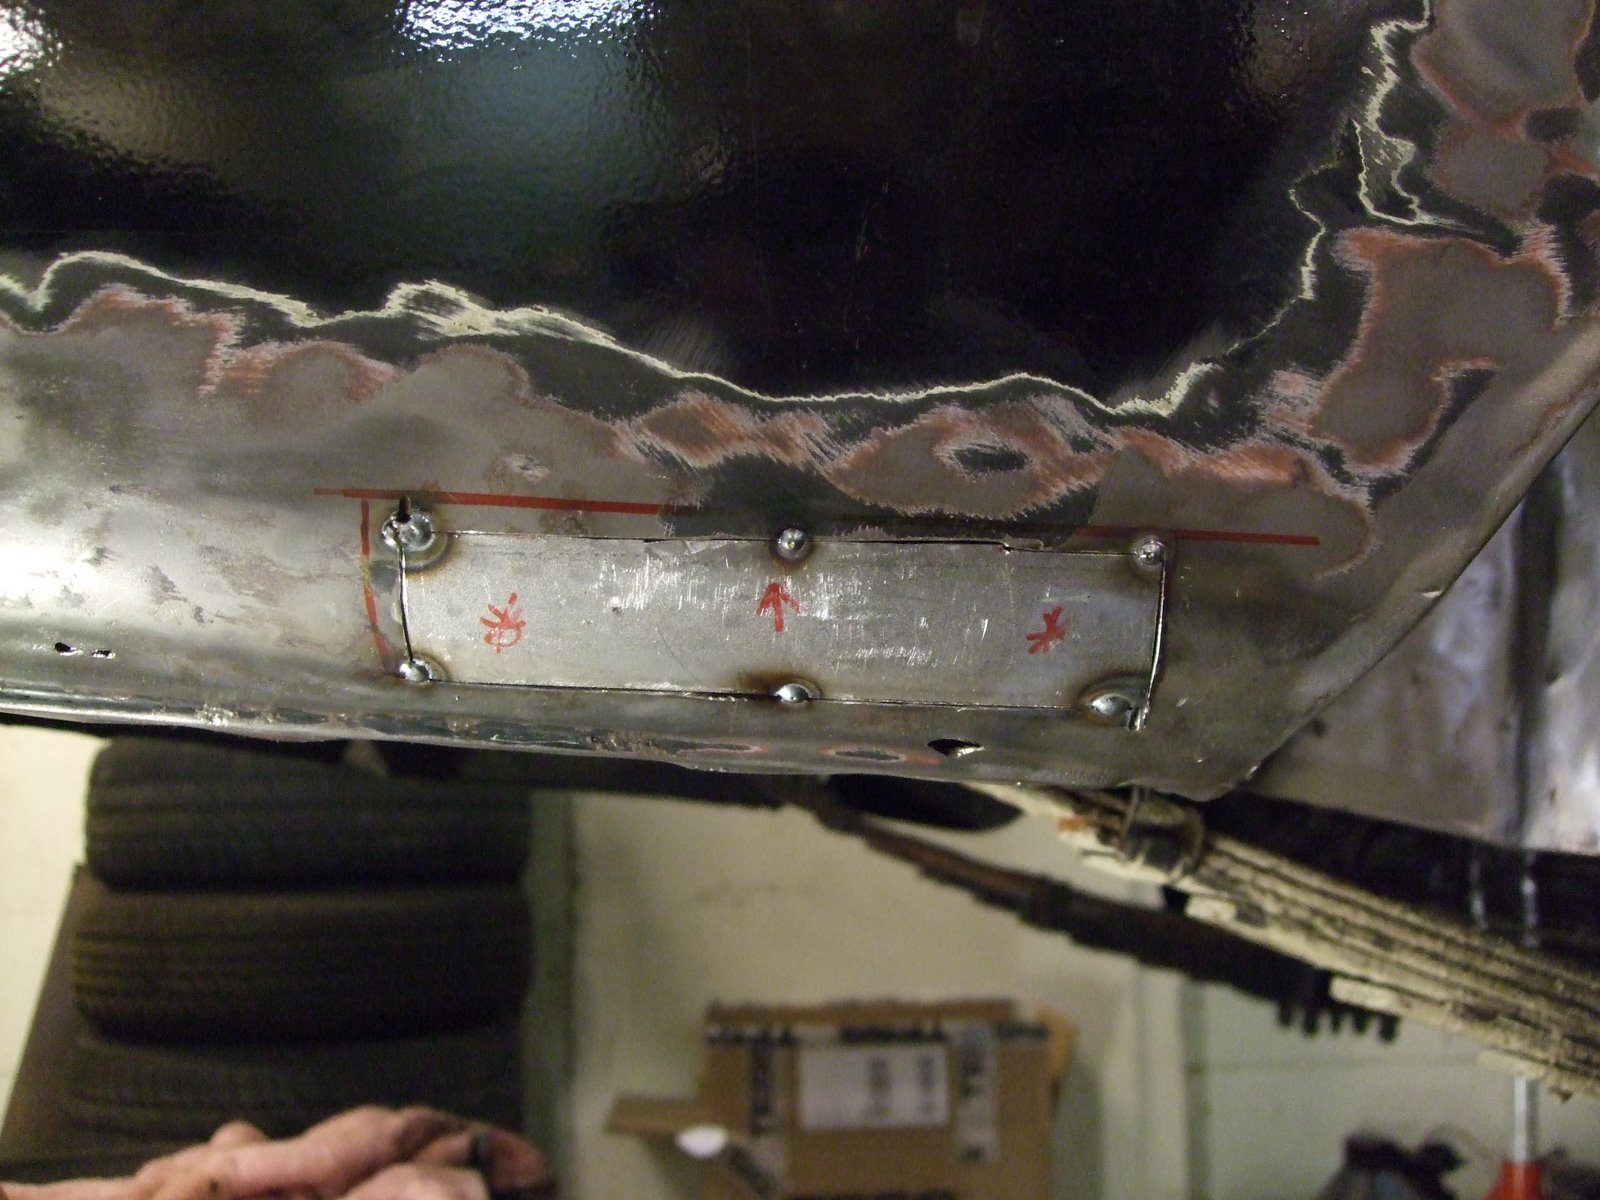
ahhh... OCD releif, it fits.


i welded the two major parts together and made the last cardboard template for creating the lip.


cue the catchphrase, 'got to be happy with that.'

maybe it's not so bad being Mr. Fussy after all, still that's 6 hours of my life i won't be seeing again.

Thursday, May 6, 2010

Bumper mounting hole

When i took the back bumper off many, many moons ago i found to my dismay that the bolt hole had been involuntarily elongated by something or other so this has been on my list of things to do once i got my confidence up with cutting and welding.

The worst bit is cutting out a bit of the wheel arch that is really rust free, but no guts no glory.


cut a bit out revealing pretty much the same story on the inner wheel arch panel.


which needed to go too, obviously. The Dremel is great for jobs like this.


I knocked up a repair piece in the time it takes you to say 'supercalifragilisticexpialidocious' (10 000 times) which i then spent a bit of time admiring....


before i welded it in.


Unfortunately i couldn't get a picture that actually did it justice, i make this my catchphrase but i've got to be happy with that.


and this is the piece i made which will eventually cover it all up again.


final corner

but that won't be going on until i have sorted out this bottom corner.


more cutting with the Dremel and i had a kind of template to work from, this one is going to be tricky to make up.


oh and it also gave another hole. Almost rust free on this side of the car now.


and this is where it's at now, i've been lucky enough to get a good few hours down the workshop this week, but now silje has 2 evenings and then a weekend working so won't be anymore until next week.

Posted by Picasa

Wednesday, May 5, 2010

shiny, shiny and more holes

the last super exciting installment found me cutting lots of holes this tim i welded a couple up, and then cut another.


Posted by Picasa

Saturday, May 1, 2010

Mayday

A red letter day in more ways than one, 1st may so bank holiday and all the shops are shut, saturday or not. Also because i got a whole afternoon at the workshop. Wooohoooo.

6 hours straight working gives me a chance to get on with doing some serious rust busting.

more mudflap mess, this time in the rear wheel arch.


from the back.


work for the angle grinder.


vacant space.

Posted by Picasa

tools for the job

Arrrrggghhhh,
all the shops shut and i stand on the last cutting disc for the dremmel. Grrrr.


Takling of tools this one has been a well spent 15 quid. Nibblers for cutting out my repair panels.


I need to shape this repair panel quite a bit compound curves and a recess for an overlapping panel, don't have that tool so i dug one out of a bit of wood.


put in the slot and hit it, repeatedly with a hammer. Simple.


I did tidy it up a bit after this.


and that goes here, in the gap.

more holes

The last bit to tackle for the day was thie rear quarter panel. More expert precision marking out. I couldn't be a surgeon.


a few swishes with the angle grinder.


the whole to be filled, I managed to knock up a repair piece for this too before i left.
And whoosh that was it 6 hours gone in a flash.

Posted by Picasa