Wednesday, June 30, 2010

Together again

Managed to get the second carburettor pieced together again a few evenings ago, I'm not 100% happy with it (OCD leave me be) so i'll probably end up partially dimantling it again before i put them back on the car. But still all cleaned up and pretty much completed.


Posted by Picasa

Time to get serious

Been putting it off for a while now, the Austin is so much more fun to work on than TPW, but as silje and the girls will be driving down to Ff in a week or so i thought i should make a proper effort to find the cause of the engine warning light that has been re-offending, every time I connect it to the PC and turn it off it comes back again within 50kms or so. It's nothing serious otherwise i would have done this sooner, but it needed doing. So a proper root around in the engine bay (after first removing the plastic engine cover, which i later managed to snap, doh!) revealed, as the diagnostic on the PC suggested, a couple defect vacuum hoses. I also found this \/ \/ \/ \/ \/ \/
a broken crank case breather pipe.


Ahhhh HA!


didn't have anything really suitbale for the breather pipe and it probably costs a small fortune at the stealership so i just bodged it together again (oddly, no picture). I'll have to get some more silicone tube of the right size to do it properly. Replaced the vacuum lines with some silicone tubing, so in theory they should now outlast the car. Connected the PC and cleared the faults again.


Two hours work to replace this, grrrr, modern cars. Now warning light free again, just hope it lasts this time.

Posted by Picasa

Saturday, June 26, 2010

long time no see

A long while back when i realised that the Austin needed more than just a swift bodging together again and before i bought a welder (it was probably winter, i was looking for jobs to do) i decided that it was time to remove the carburettors. I'd never been able to get it running 100% as it should, mainly due to not being able to balance the carburettors correctly, not surprisingly as it turned out.
The spindles were worn, all the gaskets looked like they might actually be originals, the jets were oval and one of the throttle butterflies didn't close properly when the accelorator was released.
Replacing the spindles requires a bit of machining as it really needs to fit together properly in order to work as it should and this is something i was unable to do myself. Luckily lots of norwegians have old boats with old carburettors stuck on the engines so there are still a few spesialist carburettor workshops about. I stripped the carbs ages ago, cleaned up the housings and took them down to a spesialist for the necessary work at the beginning of March. He told the job was easy and that i would have them back in a week or two, fast forward 3 months, numerous emails, text messages and phone calls and i finally have them back. This is EXACTLY why i try to do everything myself. Grrrrrr.

So 3 months plus after i took them to pieces i was faced with the task of putting them together again. This is what they look like inside. :-)


I bought a comprehensive rebuild kit ready for this job ages ago, and it was actually quite straight forward. I love doing this kind of thing and working with properly engineered stuff, imagine finding something with brass levers on in modern cars.
I only managed to get one of them rebuilt though as i quite inexplicably left the needle for the second one at the workshop and i haven't been able to get there for a few days now. So the before and after pics will have to wait.


It's just a work of art.

Posted by Picasa

Thursday, June 17, 2010

High and mighty

Ta Daaaa.

Been wanting one of these for ages, finally found a used one on the good old tinternet. I went to see it on tuesday evening and had it delivered to the workshop this morning, can't really call it a super portable device weighing in at 250kg but my spaghetti arms can just about shove it around the floor. By no means new, it was made in 1998 according to the ID plate, but it looks like it's lead an easy life.

I had seen it in operation before purchase but i connected it to my compressor and tested it and checked it over just to make sure ..... Looking goooood.


Now my poor car has been perched up on axle stands longer than i can remember now so putting the wheels on made it look more car like again. How i ever managed to get it on the stands in the first place though is a bit of a mystery to me, my trolly jack doesn't extend high enough. So a bit of a bodge to get it down again... yes mum it was super safe no limbs were place under the ve-hicle during the lowering procedure.


Took me a lot of faffing about until i was happy with the placement of the lift under the car but i got there eventually and up she goes.


All together now 'got to be happy with that.' Now i can maybe get myself a chair to sit on while i weld instead of a rug :-) I'm sure i can get one for free from somewhere.
Going to come in super handy when i change the oil in TPW too.


Posted by Picasa

Wednesday, June 16, 2010

And so it goes on

Not had as much time as i'd hoped down the workshop recently, i blame the world cup.

There really isn't much rust on this car at all compared to others that are 40 or even 20 years old, but the more you dig the more you find. I knew the trailing edge of the front wing was dodgy as it was covered in filler but as is always the case it wasn't just that bit that had been eaten away by the tin worm.

I heat gunned the filler off and started investigating.


The dremmel and a cutting disc are ace for this stuff.
After cutting off the first bit it was obvious that the end of the sill was a bitt flakey too so more of the wing had to go.


I can hopefully clean and straighten this bit up and weld it back on again afterwards.


more layers are revealed. It all looks a bit daunting but cutting bits off makes it easier to see how it all goes together again. Is that logical?? Works for me.


more cut off revealing the end of the sill.


and, oh what is this, more filler and wire mesh, the bodgers favourite, all covered up by a splodge of underseal.


attacked with a wire brush in the angle grinder. Gives this. It needs to come off too so i can see what it's like behind.


So, drill out the spot welds, all 4 bzillion of them, cut the rest with the dremmel and, more rust.


And here is where i left it, stripped back to clean metal, no rust. Just got the small matter of putting it all back together now.


Lift

New tyres for the super rims might have to wait for next years budget as i have now bought this. These are usually extremely expensive and way outside of what i can justify paying so i've been waiting for one of these to come up second hand for an absolute age and when it finally did it was
  1. cheapish
  2. in very good condition
  3. compressed air driven (no need for 3 phase leccy) 
  4. just 15 mins up the motorway
  5. he could deliver for an extra NOK500,-  
we have a security guard strike on here at the moment though so the cash machines are running out of money, just hope i can get enough out to pay him.

more pictures to follow but probably on the automobile redux blog.

Friday, June 4, 2010

Anti modern man.

Not had time to get a decent run at welding the austin and i got a bit fed up with scraping off underseal so my mind started to turn to the Pasta wagon. I finally got around to trying to find the reason for the engine warning light and accompanying error code as posted earlier. I poked about a bit and pulled an obviously sick vacuum hose from the engine. It had really gone a bit slack at both ends, i changed this (had some silicone hose of just the right diameter in stock, so to speak. See my ebay purchases really do come in handy) and then reset the warning light with my laptop again. The warning hasn't returned so far so, i'll just have to wait and see.

Time is coming for some new tyres soon too so my mind naturally started considering a possible change of wheel too. Now my, some would say, anti modern car tendencies led me to thinking about getting rid of the summer tyre alloys for something better. Everybody has alloy wheels these days so i decided to seek out and step back to steel wheels. Meh I hear you say.


Now finding wheels isn't as easy as you may think. they need to have the correct PCD, correct bolt hole size, offset, centre bore, width and of course diameter. (this is even limited to a certain range in the cars documents in Norway along with the allowed tyres sizes for the car. True.)

All cars over here are supplied with two sets of wheels, one for winter, usually steel, and one for summer, usually some fancy alloy. So there are plenty of people who ditch the winter steels and buy alloys (just because they look cooler, or so they think.)

Soooooo i had something in mind as you do and I am lucky in the fact that VAG incorporates Audi, VW and Skoda so they all have a few overlapping wheel fittings.
My ideal spec was 16"x7" with the correct PCD of 5x112, bolt hole 14mm, centre bore 57.1mm and offset of somewhere around 40.
I've been trawling the for sale ads in Oslo for ages without anything coming up until the other day and bingo a set of Audi A4 wheels with just the spec i wanted, without tyres... even better.
Only 15 mins away down the motorway too and i managed to agree a price of NOK 200,- per wheel. Happy with that.

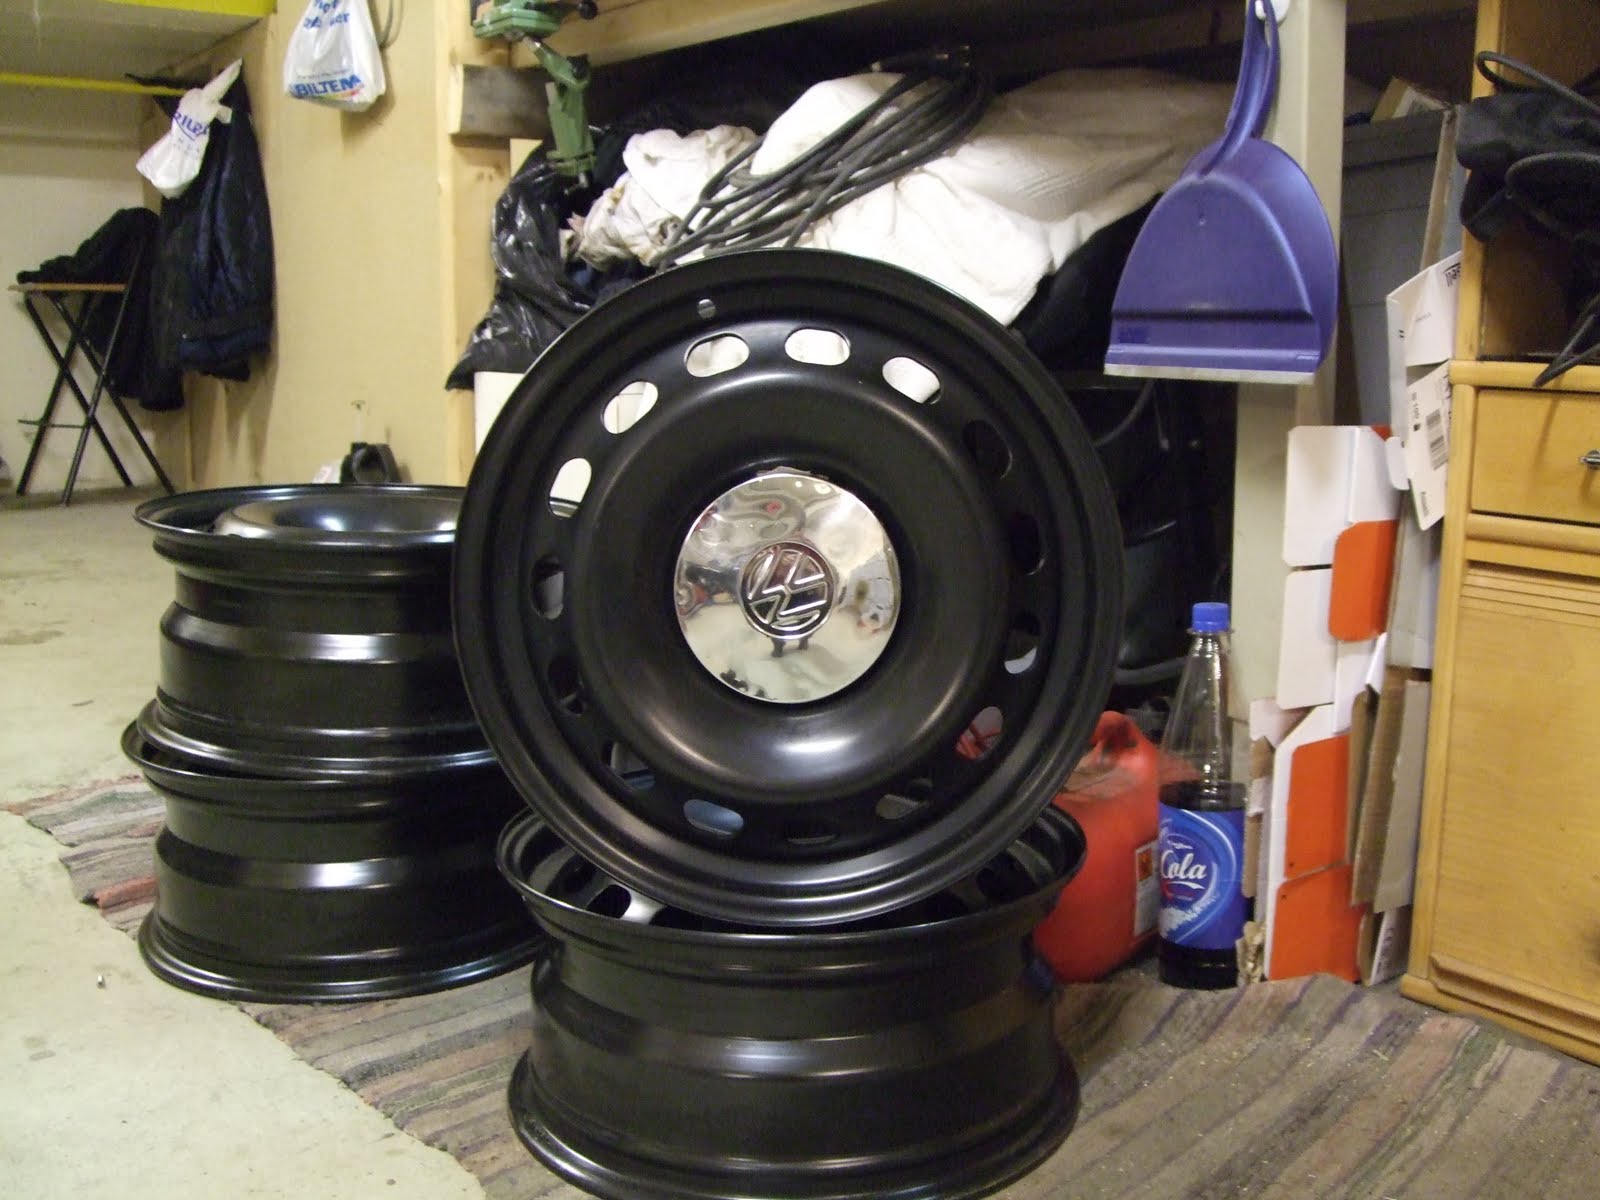
Once safely tucked up in the workshop they were scrubbed clean and found to be near mint condition, bonus.


The next challenge was finding some hubcaps to fit, i'd been keeping half an eye out for these too recently but without any wheels to play with it seemed a bit premature. The search was also proving to be a bit fruitless nothing remotely ever turned up people just throw old chrome hub caps away. So imaging my utter delight when this turned up for sale on the net, and in Oslo too. Quite staggering really. NOK 100,- secured me 4 slightly grotty VW golf MkI hubcaps, Just to see if they fitted.


and voila.... hahahahahahaha, got to be happy with that. just need find some clips and find a way of sticking them to the wheel, so work to do but this may even look OK. Oh yeah i'm going to be needing some tyres too.
EDIT - by the magic of ebay i've think i've found clips too.